
On this page
Mounting pressure can improve the thermal contact between a heater and its load, but it also changes the mechanical stress carried by the substrate. A lower interface temperature drop is not useful if the clamp bends a ceramic plate, damages a dielectric layer or transfers excessive force through an electrical terminal. The design problem is to establish a supported, repeatable contact condition across the operating cycle.
Key design decisions
- Specify the force path and support geometry before assigning a clamp torque.
- Measure contact performance at controlled heat flow, not from heater temperature alone.
- Separate compliance needed for flatness from compliance needed for thermal expansion.
Start with the complete force path
Draw the clamp, heater, interface layer, load surface, fasteners and supporting frame as an assembly cross-section. Mark where each force enters and where it returns. A broad clamp can still create a concentrated load if a washer, boss, burr or unsupported edge carries the reaction. Include the locations of slots, terminal reliefs and cutouts that interrupt the support surface.
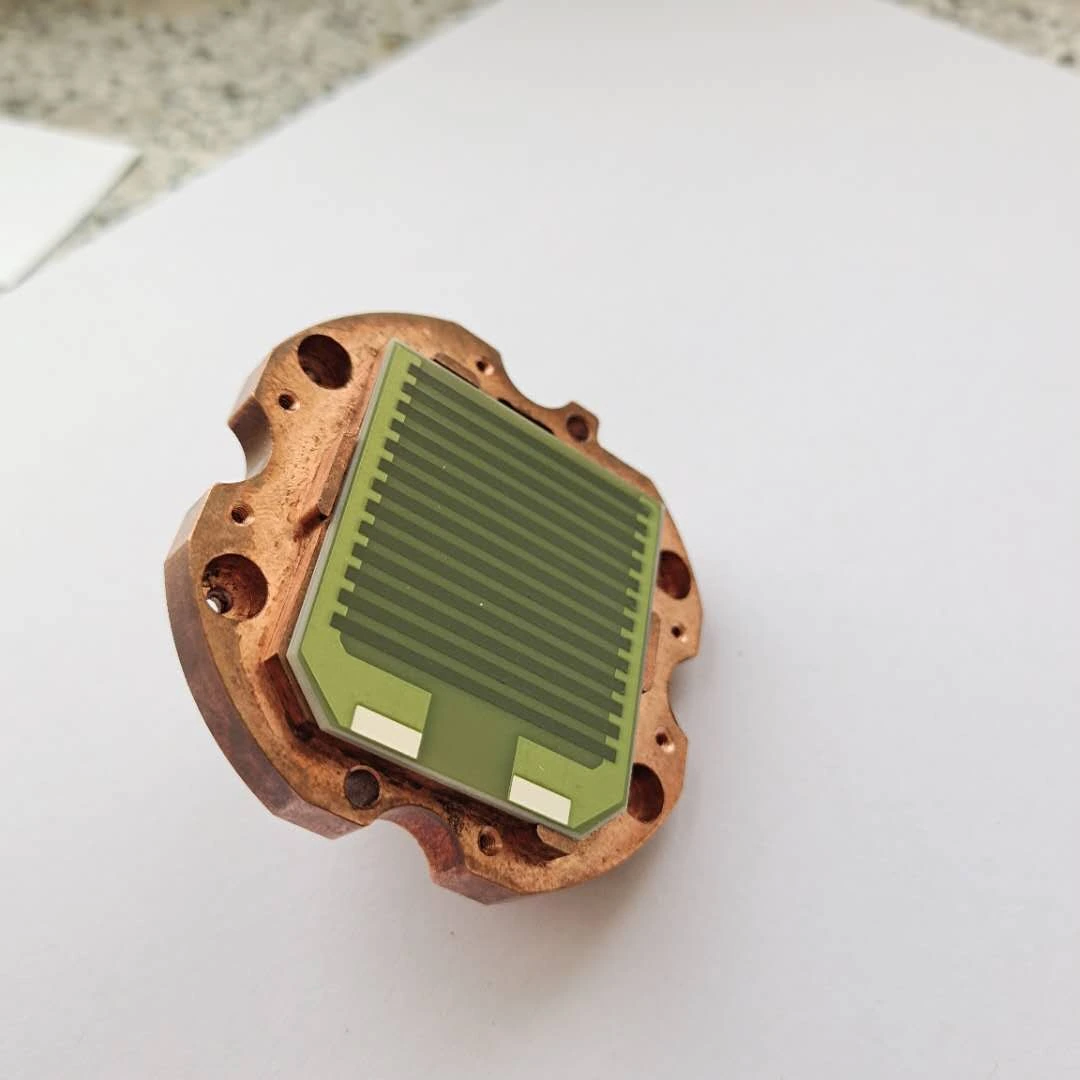
For a brittle ceramic substrate, the important distinction is between compression through a supported area and bending across a gap. The assembly may appear flat before tightening but develop a bowed load surface as the fasteners pull it into position. Inspect the actual mating parts, including their flatness and local surface defects, rather than assuming that a nominally flat drawing creates uniform contact.
Define the thermal quantity being improved
The interface temperature difference depends on heat crossing the interface, actual contact distribution and any material filling the gaps. Measuring only the exposed heater face cannot distinguish a better interface from reduced electrical input or greater heat loss to the surroundings. Establish temperatures on both sides where practical and quantify the heat path that the measurement represents.
An area-normalized contact resistance is useful when the reporting area is explicitly defined. It is not automatically transferable to a larger plate: the larger assembly may have different bow, clamp spacing and pressure distribution. Compare constructions under the same load geometry, surface condition, thermal boundary and operating temperature.
R_interface = ΔT_interface / Q_interface
- R_interface is the thermal resistance of the installed interface.
- ΔT_interface is the temperature difference across that interface.
- Q_interface is the heat rate crossing it, not necessarily the entire electrical input.
Use a sufficiently steady condition and account for significant parallel heat-loss paths before estimating interface resistance.
Why torque alone is an incomplete specification
A screw torque does not uniquely determine clamping force. Thread friction, surface finish, lubrication, washer geometry and assembly history all influence the conversion. Even equal fastener forces do not guarantee equal local pressure if the fixture bends. A torque instruction is an assembly control that must be connected to a validated mechanical design.
Choose a practical means of maintaining force through temperature change, such as a properly selected spring arrangement, and assess its travel and relaxation. Keep this assessment separate from any claim about a particular spring or fastener temperature limit. Record the tightening sequence and whether the assembly is measured cold, after a thermal settling cycle or during operation.
Use compliance deliberately
A compliant interface may bridge small surface irregularities and reduce concentrated loading, but its thickness and thermal conductivity add another resistance. Excess material can squeeze into connector regions, contaminate exposed conductors or change the position of the ceramic relative to a mechanical stop. Specify the coverage and exclusion zones as well as the nominal thickness.
Thermal expansion creates a different requirement. A ceramic plate and a metal load can change length by different amounts, so a rigid attachment may develop shear even when the normal contact pressure is modest. Decide which surfaces are allowed to slide, which component locates the assembly and which feature retains it. Do not rely on an unspecified soft layer to solve every mechanical mismatch.
Run a controlled pressure series
Increase loading through a planned series within the assembly's mechanical design envelope. At each step, record applied force or a calibrated assembly setting, input power, temperatures, settling time and visible movement. Repeat selected settings after unloading to identify hysteresis or permanent change. A pressure setting that works only on the first assembly is not a robust production instruction.
Separate a performance plateau from a measurement floor. If additional pressure produces little apparent thermal benefit, verify that sensor placement and repeatability can resolve the expected difference. A plateau can support a lower-force choice only after the contact remains stable through the relevant operating cycle.
| Observation | Possible interpretation | Next check |
|---|---|---|
| Lower interface temperature drop at equal heat flow | Improved contact or thinner interface layer | Measure displacement and inspect squeeze-out |
| One corner remains hot | Local loss of contact or asymmetric heat loss | Check support flatness and clamp sequence |
| Temperature improves while resistance changes permanently | Mechanical loading may be affecting the electrical structure | Unload and inspect the circuit and terminals |
| Results drift over repeated assemblies | Interface distribution or force control is inconsistent | Repeat with documented material amount and fixture setting |
Protect terminals and geometric discontinuities
Terminal pads, solder joints and lead exits should not become unintended support points. Provide clearance for their actual installed height, including insulation and strain relief. A clamp that presses a wire against a ceramic edge may introduce both a mechanical load and a local thermal sink. These effects can be missed when a thermal test uses loose laboratory leads.
Holes and slots deserve explicit attention because they alter the stress path and available contact area. Do not assume a mounting hole is a clamping location simply because it is present. Establish edge distances, washer contact and assembly orientation from the approved part design, and inspect the surfaces around these features after thermal cycling.
Check pressure retention across the use cycle
At temperature, fixture expansion can increase or decrease preload. Repeated operation can also change an interface through settling, migration or mechanical wear. Track temperatures and assembly displacement during warm-up and cool-down rather than measuring only at a steady hot point. Where feasible, compare the cold state before and after cycling without disturbing the assembly.
Use the intended mounting orientation, harness routing and environmental exposure. A benchtop sandwich held flat by gravity may not represent a vertical installation with vibration and lead forces. After the sequence, look for edge chips, witness marks, dielectric abrasion, joint displacement and persistent resistance shifts. Each observation should be tied to a location on the assembly drawing.
Turn the result into an assembly definition
The final installation definition should identify mating surfaces, surface preparation, interface material and amount, force-control method, tightening sequence and permissible movement. Include a diagram of the support and locating features. A drawing note that says only “clamp firmly” cannot reproduce the evaluated condition.
Keep the thermal operating envelope linked to this installation. If the mating material, plate thickness or clamp layout changes, reconsider the pressure distribution and heat path. This is particularly important when a heater is transferred from a development fixture to a lighter production housing: the electrical part may be unchanged while its local temperature and mechanical loading are substantially different.
Define the heater mounting interface
Send the assembled geometry and operating conditions so the thermal contact and substrate loading can be considered together.
- Heater outline, thickness, holes, terminal positions and supported regions.
- Mating material, flatness information and available interface layer.
- Clamp layout, fasteners, assembly sequence and intended force control.
- Input power, target load temperature, orientation and cycle profile.
- Observed temperature map, movement or damage from any existing assembly.
The drawing-upload form loads as you reach this section.